


February 20, 2018
Amazon didn’t invent the cross-selling technique, but on B2C sites, it made this type of functionality commonplace: “Are you also interested in these products?” Consumers are now used to this type of recommendation, and we can implement this idea using automated emails in HubSpot.
A few months ago, I wrote a blog post on how to create a thank you page to cross-sell other products. Although a thank you page works for people who are already in your HubSpot database, it won’t work for people who just filled out a landing page, because HubSpot needs up to 20 minutes to enter these contacts into the system.
Enter automated emails. Used in conjunction with workflows, automated emails in HubSpot can be a powerful tool for upselling and cross-selling customers.

One way to accomplish this in HubSpot is to run a workflow that determines related products once the first product is purchased and then to include that information in an automated email.
Let’s look at a real-world example.
AFPA offers online fitness and nutrition certification programs and claims thousands of customers around the globe. (Also, AFPA just so happens to be a SmartBug client.) AFPA's popular Holistic Nutritionist Certification course has been selling like hotcakes recently, so it's perfect for our example.
When someone purchases a product, the AFPA store updates a field in HubSpot called “Last Order Product Name.” (AFPA uses BigCommerce, but this concept could apply to any system so long as the purchased product information is passed over to HubSpot.)
For offline purchases, you could also select the product purchased manually. As another example, a product field could be populated by Salesforce when a deal is closed.
In the automated, post-purchase email, we plan to cross-sell two additional products.
The first step will be to create two to four custom fields for each cross-selling product inside of HubSpot. (See these instructions on creating custom fields.)
The process would look like this:
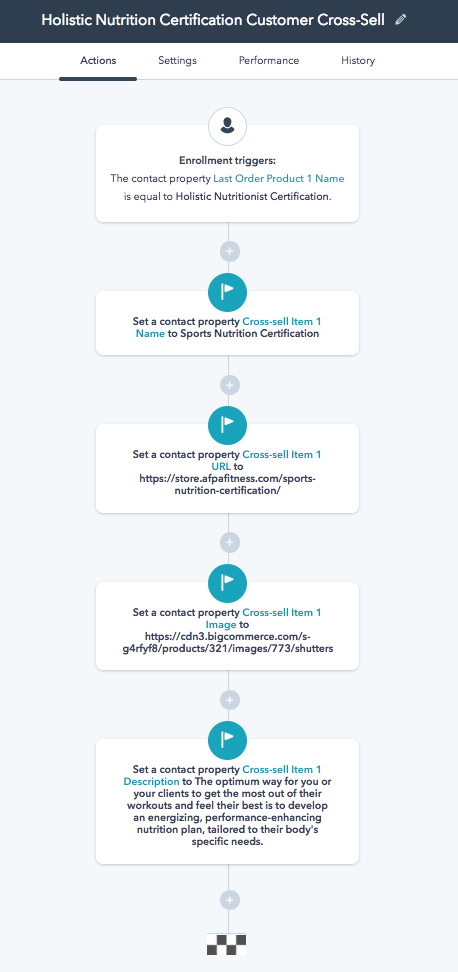
Cross-sell Item 1 Name (single-line text or dropdown)
Cross-sell Item 1 URL (single-line text)
Cross-sell Item 1 Description (single-line text) - optional
Cross-sell Item 1 Image (single-line text) - optional
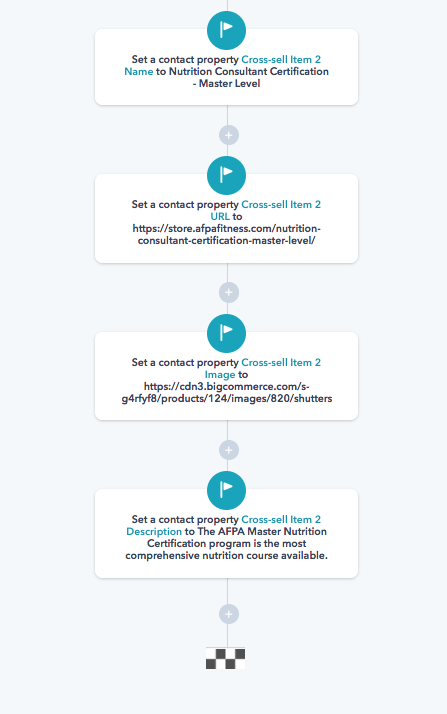
Cross-sell Item 2 Name (single-line text or dropdown)
Cross-sell Item 2 URL (single-line text)
Cross-sell Item 2 Description (single-line text) - optional
Cross-sell Item 2 Image (single-line text) - optional
Once you've created these custom fields, we can use them repeatedly and assign values using a workflow.
For AFPA examples 1 and 2, we will be offering the Sports Nutritionist Certification and the Master Nutrition Consultant Certification.
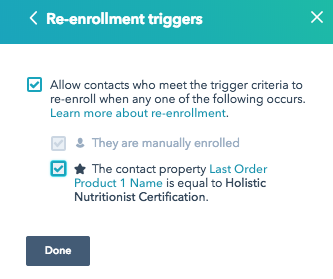
If repeat purchases of the same product are possible, select the checkbox so that purchasers can be enrolled multiple times.
You will want to create a similar workflow for each product in your portfolio so that each product has its own workflow (and thus, cross-sell product values).
Now, on to the email!
Create an automated email inside of HubSpot and use personalization tokens to define the cross-selling product fields. (See these instructions on using personalization tokens.) This is the sample email from AFPA:
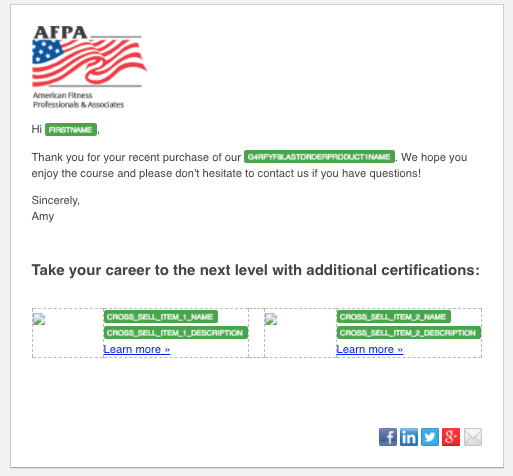
At the top of the email, you can see the First Name token as well as the Last Order Product Name token. Below are the four cross-selling product tokens for each cross-selling product. Note: The image token doesn’t appear in the email editor.
The source code looks like this, in case you want to replicate it:
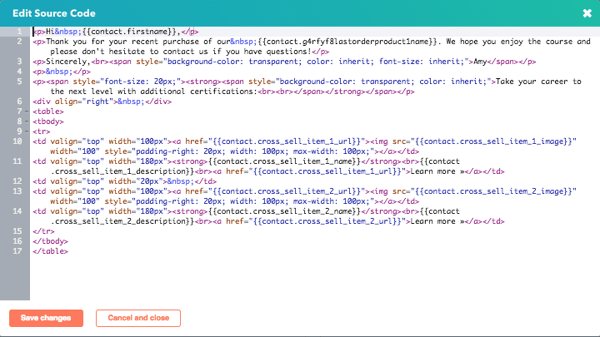
Review a few notes about how to make this work (as you will see in the source code above):
Wrap your image token in a bit of HTML code for it to work:<img src=" ">
">- You can also add styling elements such as width and padding.
<a href=" ">TEXT OR IMAGE YOU WANT TO LINK</a>
The name and description tokens will work just fine as they are, but you can add some styling elements if you want.
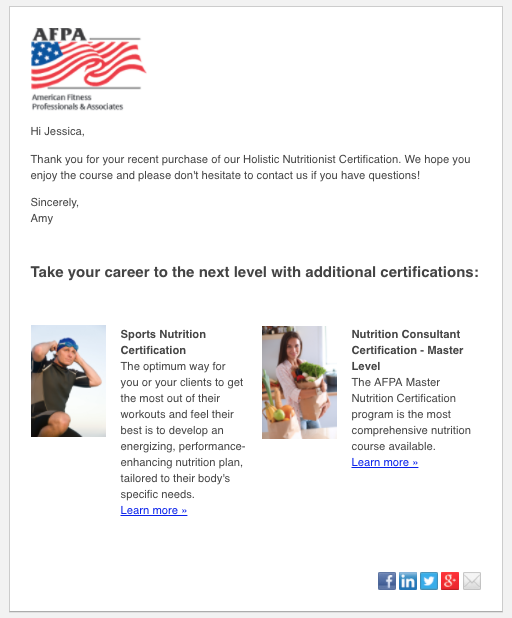
When you’re all done, it will look like this to the customer:
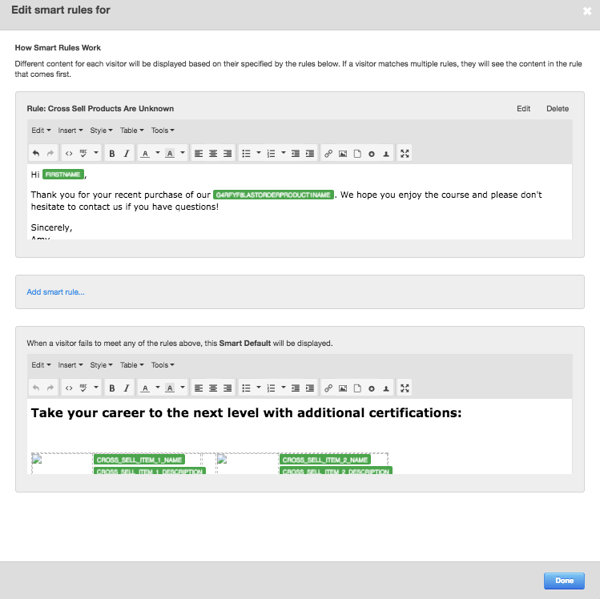
Because I like to be thorough, I would also recommend creating a smart version in case the cross-selling products are unknown. (See these instructions on how to make your email smart.)
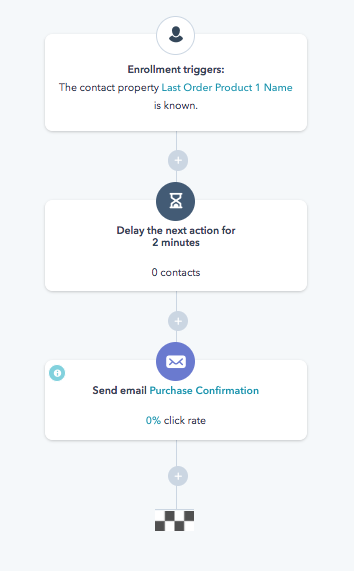
The last step is to set up a separate workflow that sends an automated email when a new purchase is made. The workflow enrollment should be triggered by a form fill or other criteria that your system recognizes when there is a new order. (The delay is not necessary if you don’t want it.)
You could put the automated email at the end of all of the product workflows; however, it means fewer steps (and a cleaner process) to put the email into its own workflow.
So that’s it! You're ready to go.
This methodology could also be used to “cross-sell” resources based on an e-book or white paper downloaded by the customer. This allows you to personalize the offers linked to the topic that has already attracted your lead.
A few custom fields, a few workflows, and an automated email—that’s all it takes to start cross-selling today.


Learn about web optimization with:
The Keys to Website UX and Usability


Other Insights You Might Like
-2.png?width=800&length=800&name=Blog%20header%20image%20(1)-2.png)