


July 2, 2019
Are you ready to take the plunge into some hard-hitting HubL code and JavaScript to build a robust location finder? Then you have found the perfect post. In a previous post, we showed you how to create dynamic pages using HubDB, but now we are going to dig a little deeper into some more advanced features and walk through the intricacies of putting all of these pieces together.
Although HubDB is not a true relational database, you can get much more functionality out of it than you would expect. The only main downside to HubDB is trying to reorder entries made into the table, but luckily HubSpot gives developers some pretty decent documentation on how to change the ordering once rendered on the actual page.
Prepare the Database
This tutorial assumes that you have a working knowledge of HubL and JQuery/JavaScript. For the purpose of this tutorial, I keep the logic as simple as possible, giving you the ability to expand upon it as necessary. I show live screenshots of how this is implemented on a real site, as well as the use cases associated with it.
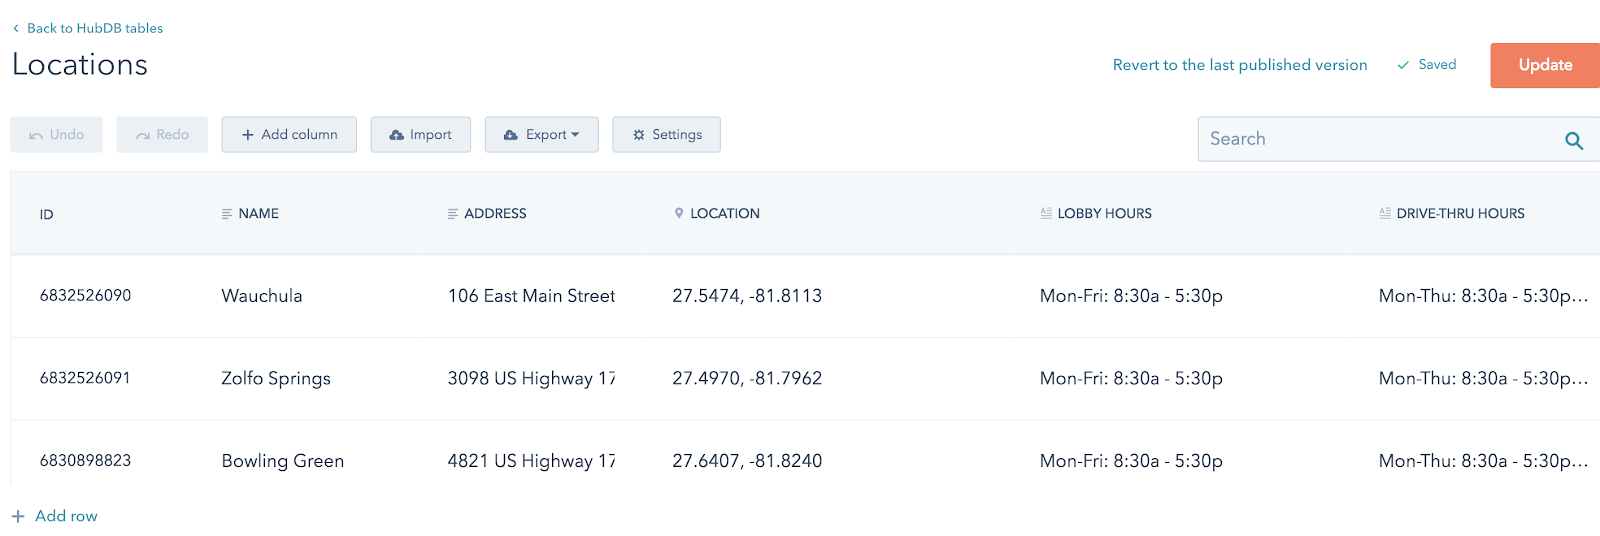
The first step is to create a brand new HubDB table. You’ll want to add any necessary attributes, such as the location name, hours, address, or any other items you find relevant. The most important item to add is a location column, which is a built-in GPS coordinate column.
Register Google Maps API & Set Up Store Locator Plugin
Google Maps recently changed its process for using the Google Maps API. It now requires that an account be set up with a credit card attached in case you reach the limit for API calls. Once you successfully set up your account, you will receive a unique API key.
You will need to add the following script sources to your site replacing the key below with your unique key. You will also need to include JavaScript source files for the jQuery Store Locator Plugin, as well as the handlebars.js plugin.
|
|
Next, you’ll need to prepare your HTML to have data inserted into it. You’ll also set up a form input so that the user can enter an address or zip code that will be checked against the jQuery Store Locator Plugin.
|
|
Now is time for the jQuery Store Locator Plugin. In the mapSettings call, you can see how we reference the Google Maps API, and in the dataRaw field, we are plugging in all of the HubDB fields for each row. You can edit the various properties by using the documentation for the Store Locator Plugin. For instance, you may want to set a custom marker image that fits your branding or changes basic colors and stylings.
|
|

Showing the Results
In order to show the results, you need to have an HTML section that will be revealed after the search has been completed and that you can reference in the jQuery. The results will be revealed and utilize the Handlebars plugin to push the data to the screen in an easy and effective manner.
For the sake of this example, we have tried to use the simple as naming conventions possible so that you can understand what is happening behind the scenes.
You can even create conditions, as seen with the location “if” statement, to only render data that is relevant to the search result so that there is no extraneous HTML. For a developer, it doesn’t get much better than that!
|
|
You may notice that the “raw” section is referenced both in the jQuery Store Locator Plugin as well as in the HTML above. In the Store Locator Plugin, we are assigning variables using Handlebars that we are later revealing their content for each individual search result.
This is all you need to create a simple store locator. You will notice that the Locator Plugin will return an error message via a browser alert if a search query doesn’t return a result from within your specified range of miles.
How Does It Look?
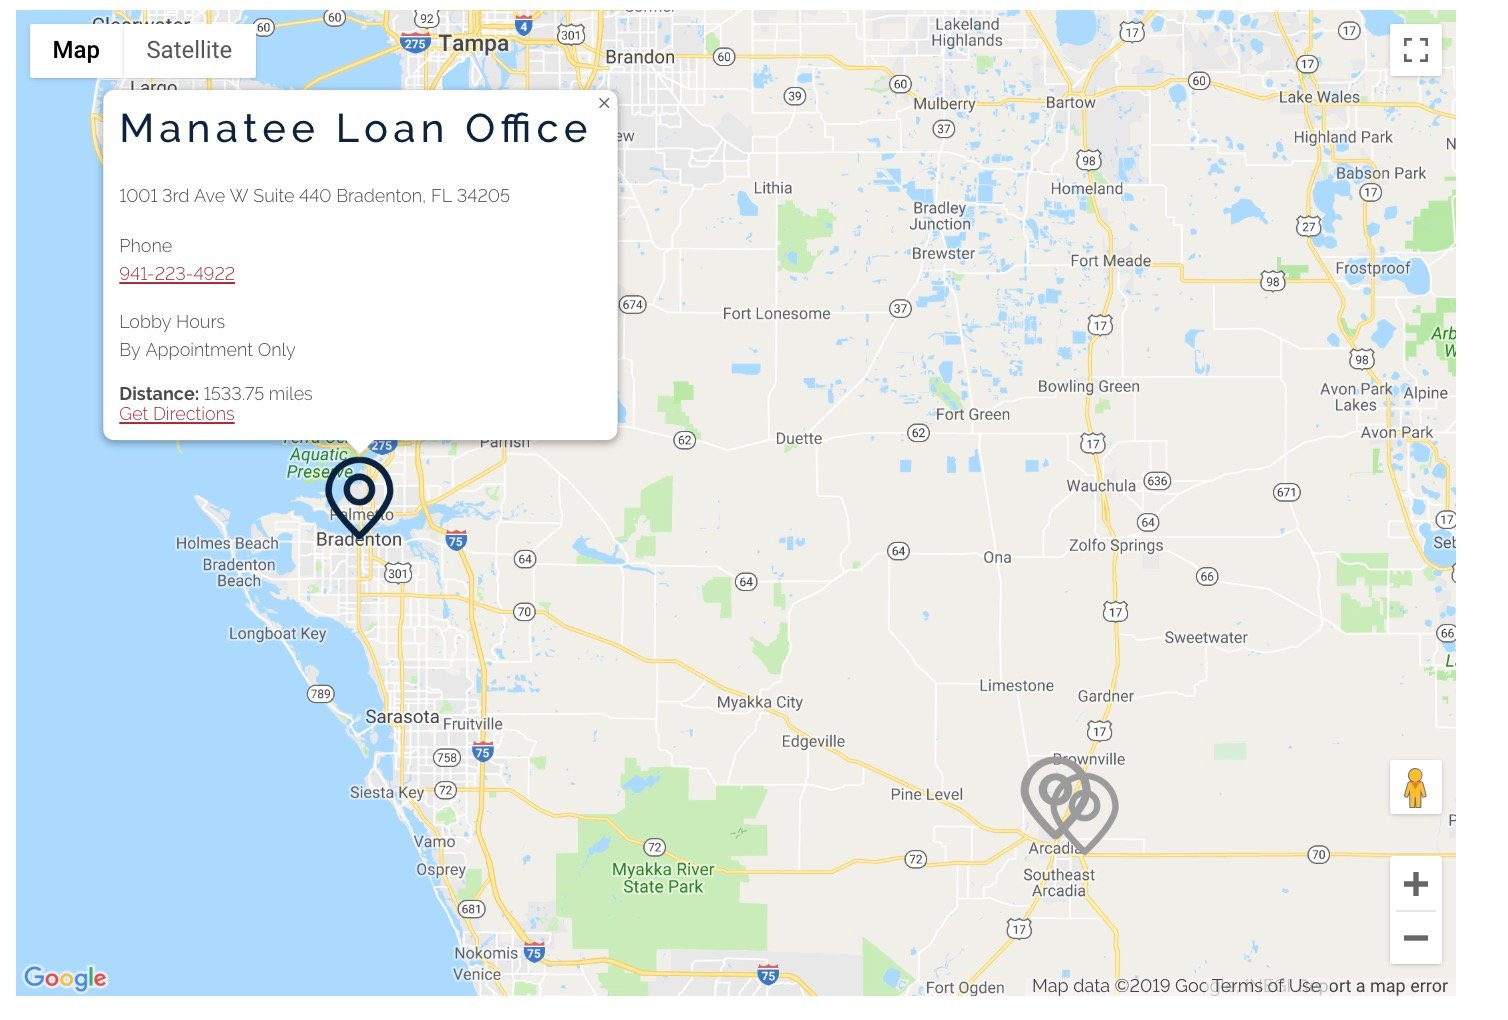
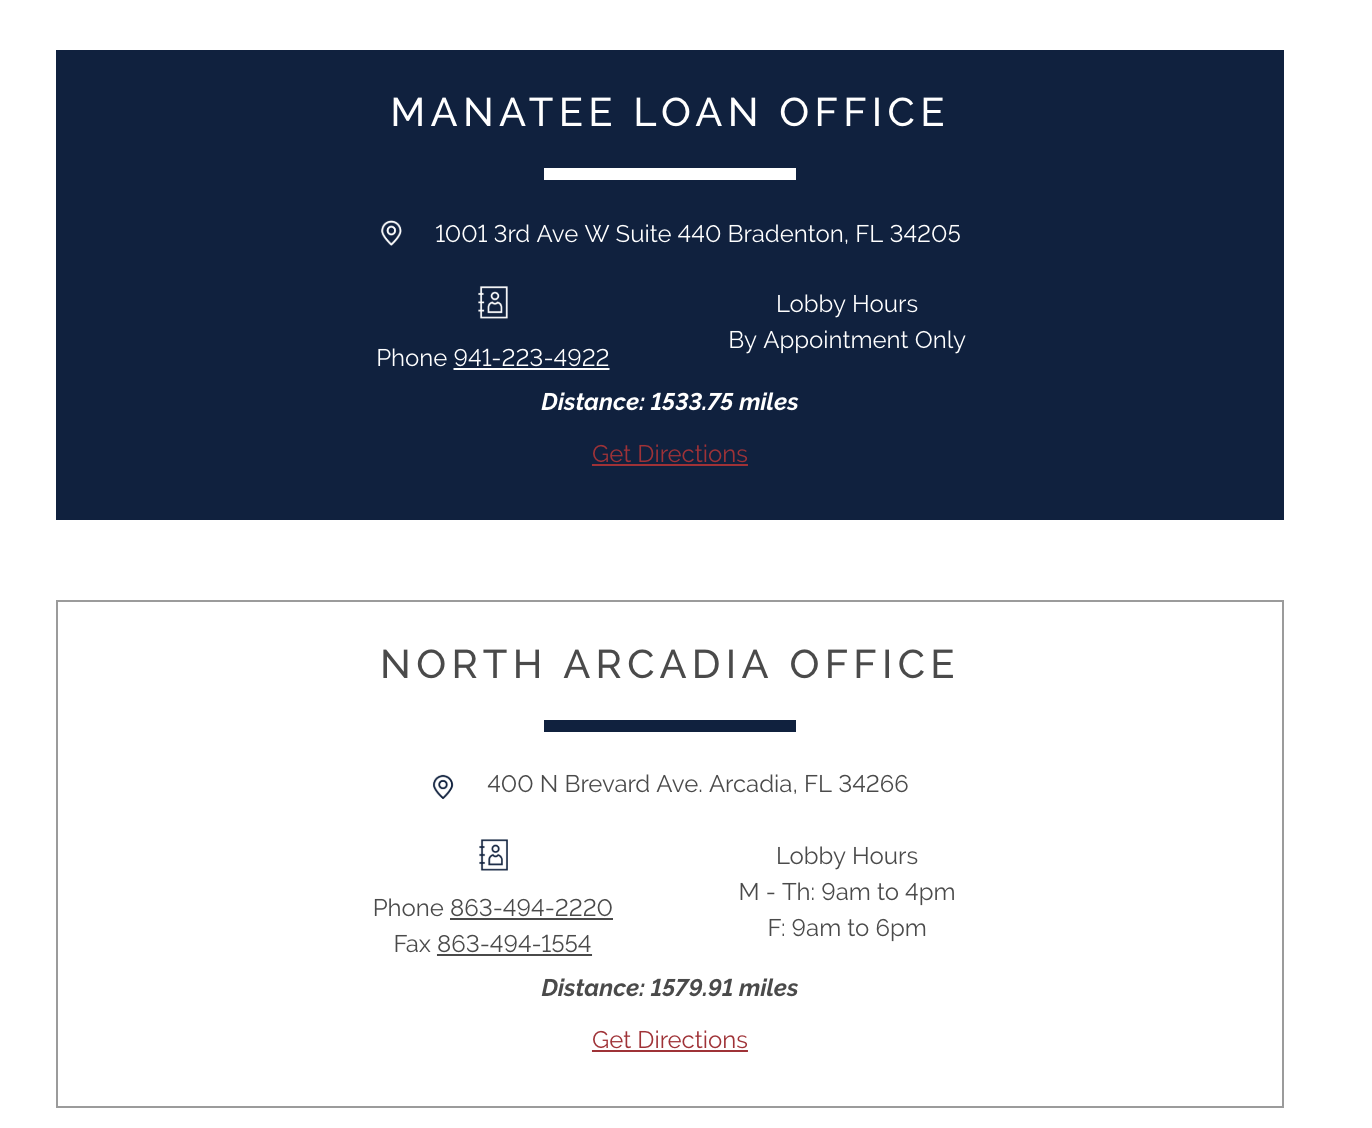
As you can see, once you are able to get all of the information to render on the page, you have the ability to add any CSS and stylings that you might need. If you run into any errors, I suggest manually plugging numbers into the Store Locator Plugin to assess whether the error is from HubDB or your initial setup with the jQuery Store Locator Plugin.
Although there are many ways to leverage HubDB in your website redesign and many more advanced options for this locator, hopefully this information will get you started on your HubDB journey to creating dynamic content for your visitors.

Plan, design, build, and launch your website successfully with:
Mastering The Art of Website Redesigns


Other Insights You Might Like
-2.png?width=800&length=800&name=Blog%20header%20image%20(1)-2.png)