


July 3, 2018
Sometimes a website includes a huge directory of partners, businesses, services, and so on, and manually creating individual pages for that directory is a hassle. Luckily, with HubDB, you can dynamically generate pages from a table. By inputting all of your content into a HubDB table and creating a template using HubL to grab that content, you can build as many pages as you need by publishing just one page.
Recently at SmartBug, we did just that for our client Tempo who needed a partner directory listing of 150+ partners. It would have taken ages to create individual pages for each partner through the website dashboard. Instead, we gathered all that content into a HubDB table and generated 150+ pages in dramatically less time than it would have taken to publish 150+ pages by hand. How is this done?
Creating dynamic pages requires you to create a HubDB table and code a template built specifically for handling dynamic content, so you’ll need to be familiar with Hubspot’s design manager, HubDB, as well as HubL syntax.
1. Create a Table
First things first, make your way to the HubDB portal. If you are using the old Hubspot header, you can get there by going to Content > Website Pages and then clicking the “HubDB” link in the “More Tools” drop-down in the sidebar. In the new Hubspot header, you can find the link at Marketing > Files and Templates > HubDB.
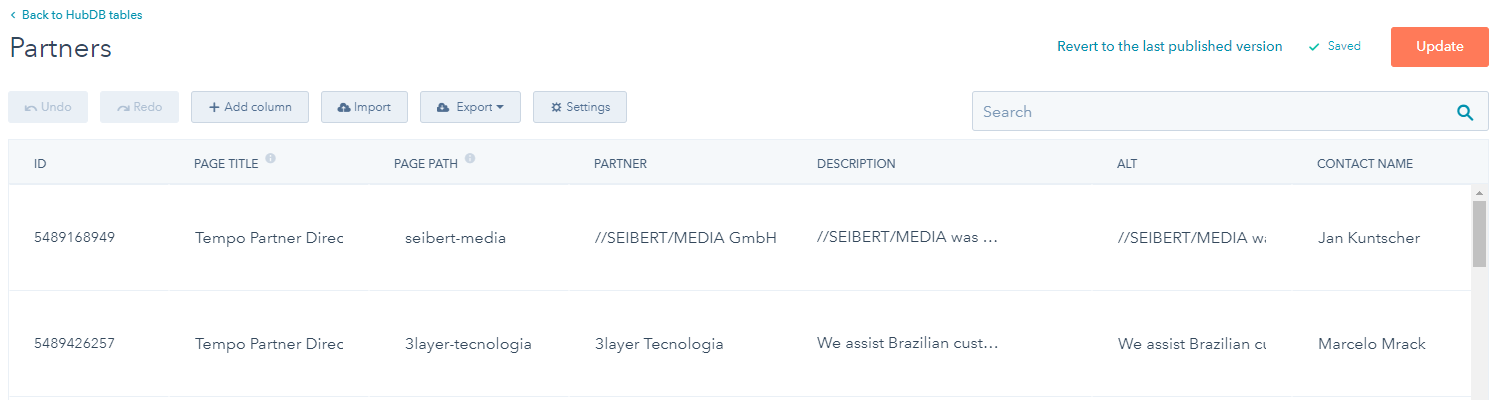
Once there, click the “Create table” button and go ahead and change “Untitled” to what you would like your table to be called. For Tempo, we simply named it “Partners”.
Very important step: Click the “Settings” button at the top of the table and check “Use for dynamic pages” and then click “Update”.
Checking the table to be used for dynamic pages automatically creates two columns: Page Title and Page Path (the URL path of the page). These columns are what Hubspot uses to create the individual pages.

In this table, you are going to be entering every last bit of dynamic content (any content that will vary from page to page) and there are two ways you can do this:
- Type in the content. You will need to use the “+ Add Column” button to create a column for each piece of content. Then, go row by row entering in text, images, urls, and so on.
- Import the content. If you have a .csv file of the content, you can use the “Import” button at the top of the table to pull it in and create columns based on the sheet. If you have columns for a page path and title, you can also populate those columns using this method.
When you have finished entering all of your content, click the “Publish” button so you can start using your new table.
2. Code a HubL Template
This next step brings us to the nitty gritty of coding a template to handle the dirty work of building all your pages for you, so make sure you have a developer on hand.
If you are using the old design manager, you will be able to build the dynamic part of the page using the custom HubL module. If you are in the new design manager, you will need to create a custom module to code in.
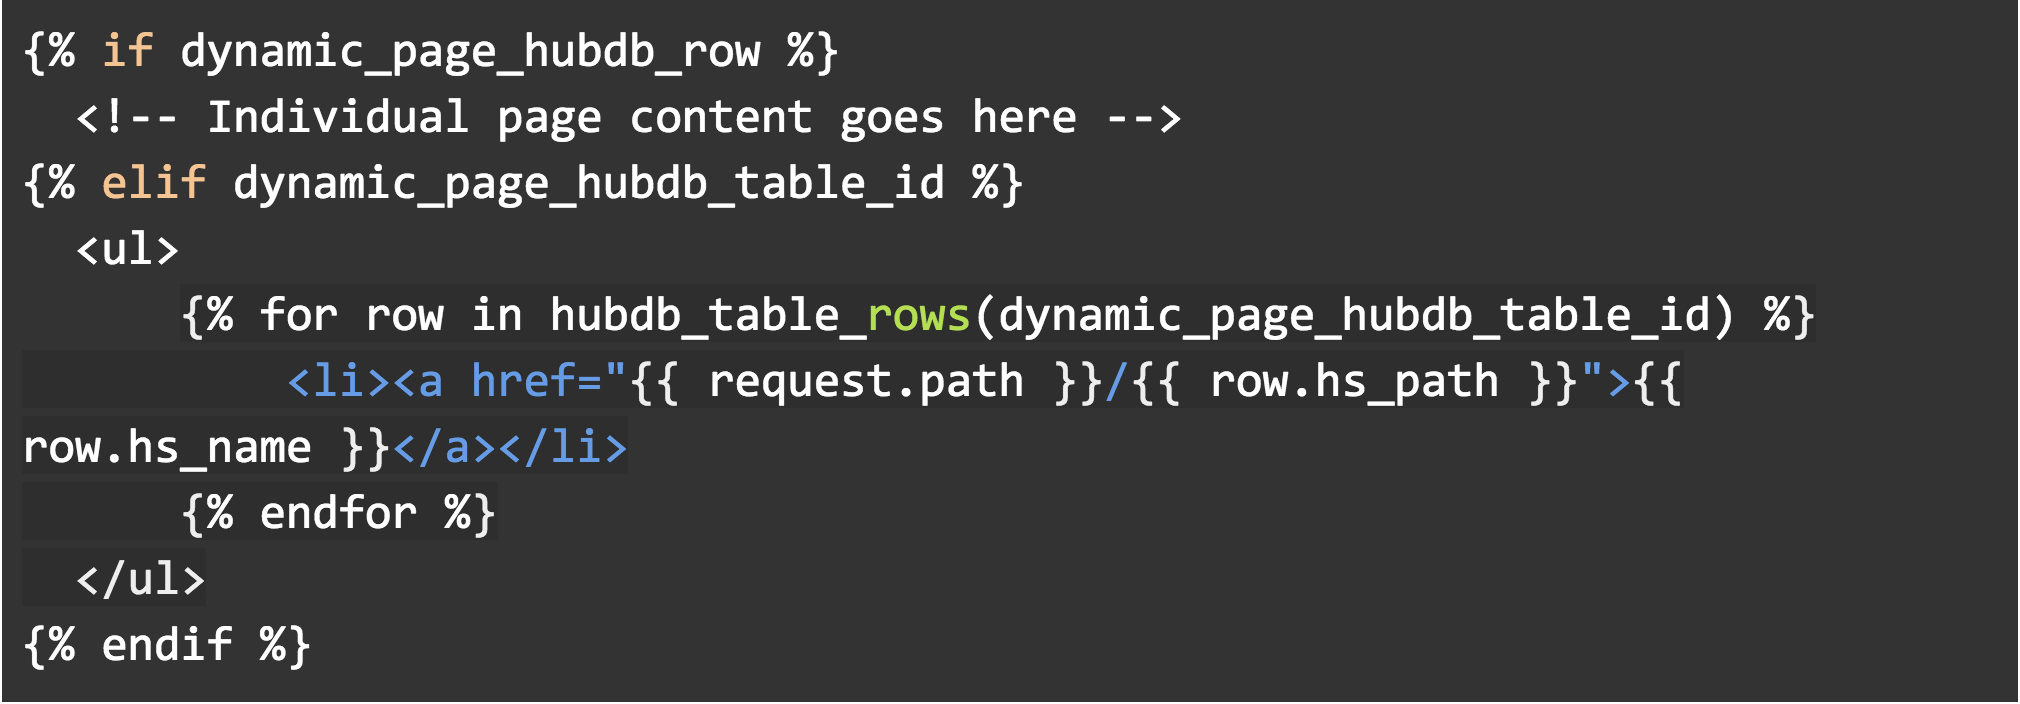
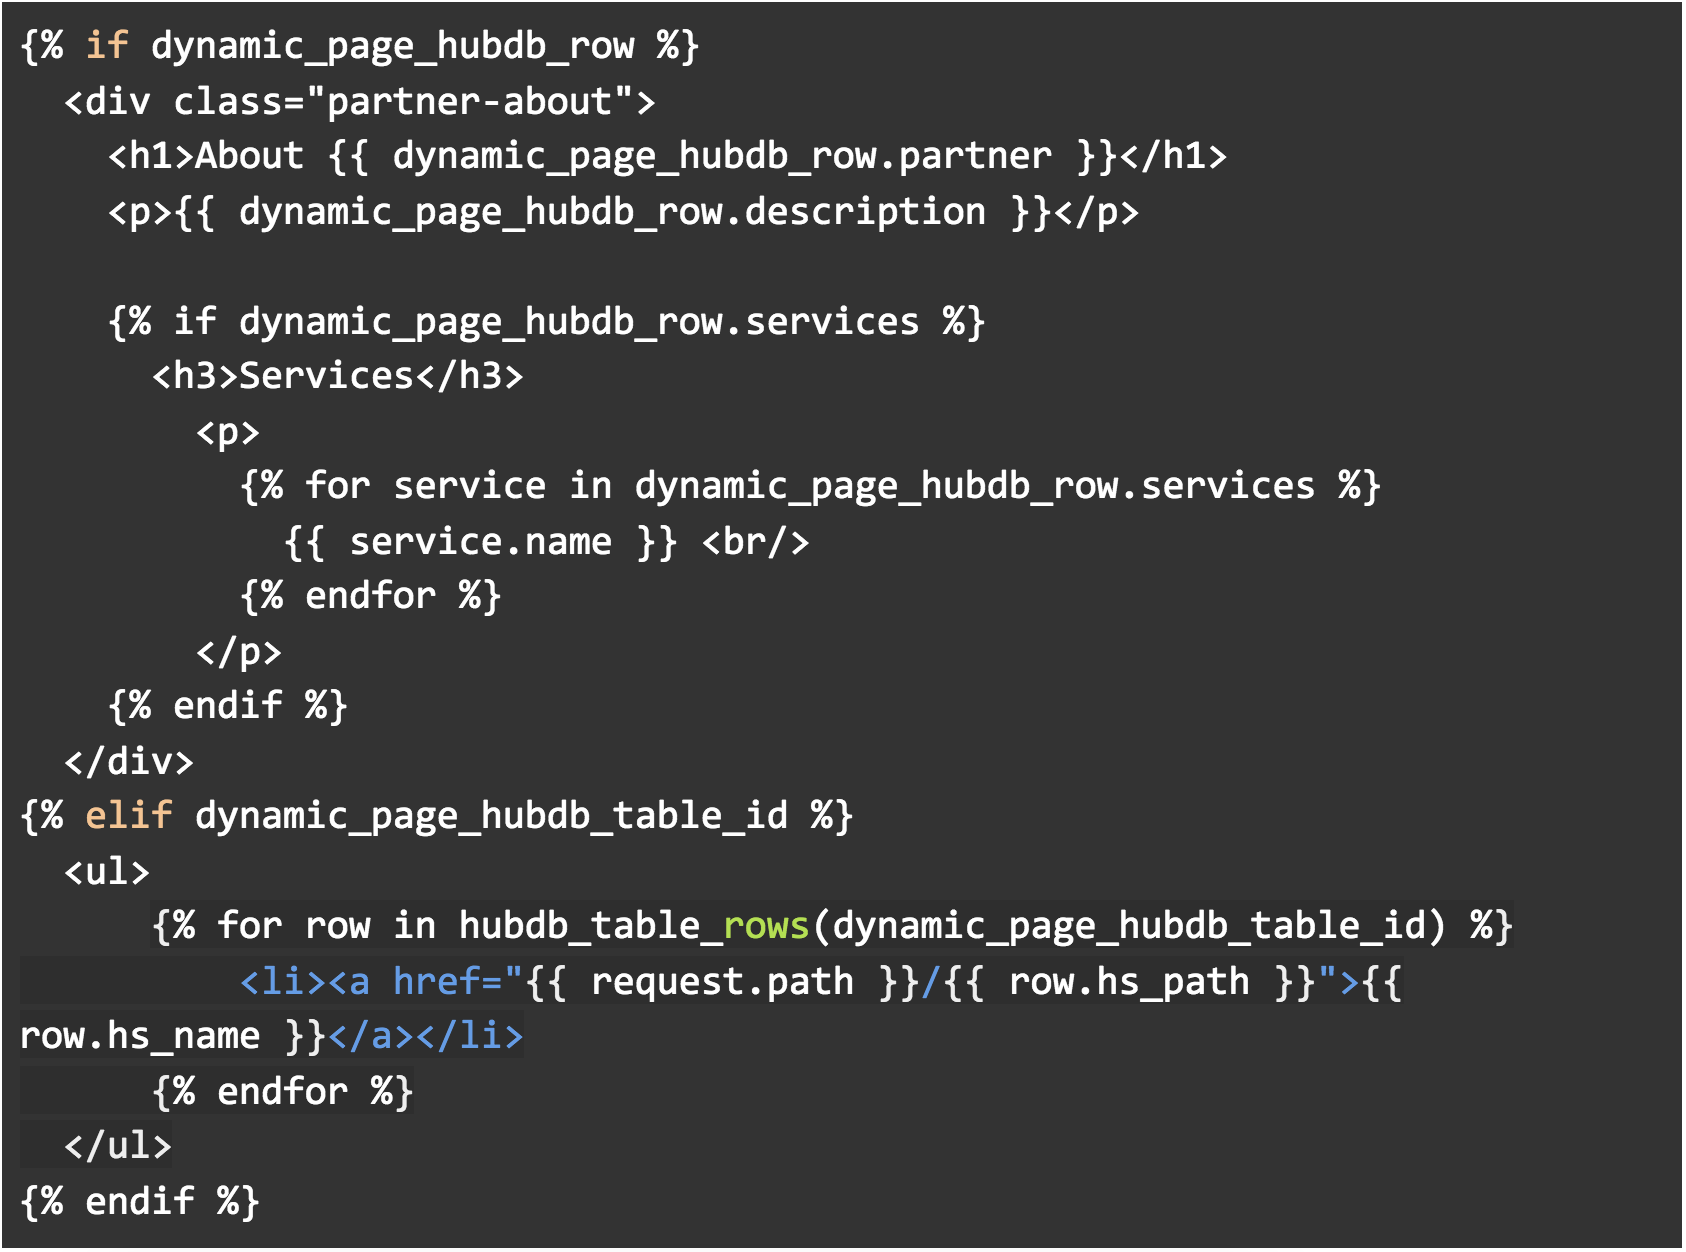
To start off, you need to separate what will be the listing page content and what will be the individual page content. You do this with a simple HubL “if” statement.

In the listing page content, you will use a “for loop” to iterate through the rows of your table and display the content of each row (in Tempo’s case, each partner). The example code below shows how to loop through the table and display a list of links to each page that’s going to be created.
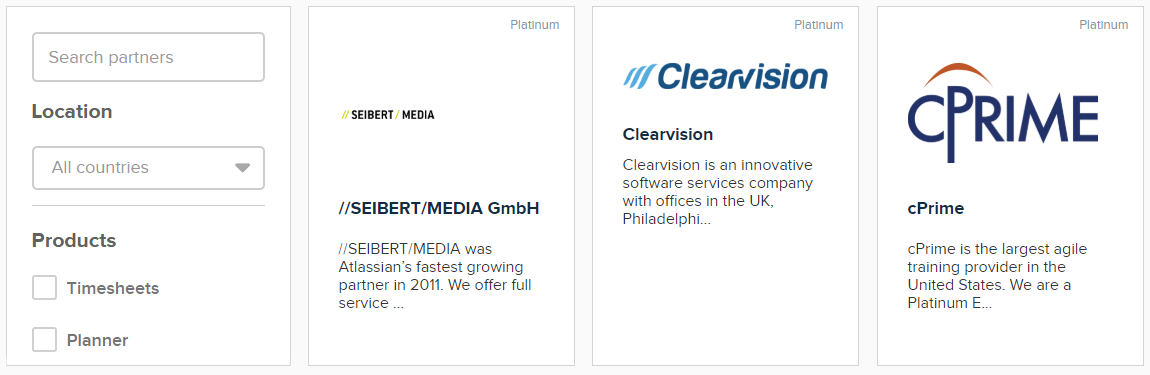
For Tempo, we used the data from the table to create a list of partners showing the partner name, a description, their logo, and their partner tier. It was even possible, with the help of some javascript, to use that data to build a search and filter functionality for the directory.
Once you have the code for your directory written out, it’s time for the individual pages. All you have to do is build your page and add a certain HubL variable wherever you need to input dynamic content.

You can plug this variable into your content like so:
3. Publish a Single Page
With a table full of content and a stylish template for your content to populate, you’re ready to work some magic.
From the website dashboard, or even Content Staging, create a new page like you normally would and choose your newly built template. What you will do differently from creating a static page is go to Settings > click Advanced Settings > and under heading “HubDB” and in the “Table for dynamic pages” drop-down, choose the table you built. Hit the “Publish” button and Hubspot will automatically create URLs and pages from the contents of your table.
You can have hundreds of pages built at the click of button and build new ones just by adding new rows to your table. They’ll show up in Google searches and even generate analytics, but because you’ve technically only created a single page, the dynamically generated pages won’t show up in your website’s page listing. All the editing, adding, and deleting of content for these pages is done strictly from your HubDB table.

Learn about web optimization with:
The Keys to Website UX and Usability


Other Insights You Might Like
-2.png?width=800&length=800&name=Blog%20header%20image%20(1)-2.png)