


February 20, 2018
Last year HubSpot rolled out HubDB, a database platform to be used in HubSpot. Although documentation shows a few use cases for the platform, one common request that we often receive is the ability to create event listings. Historically, we have been able to do this in a hacky way using HubSpot’s blog tool. The main issue with using the blog tool, however, is there has to be a way to archive the post from the listing page so that old events don’t show up. Also, sometimes the events link out to external event pages or custom landing pages, so the actual blog post isn’t used and is really an unnecessary step.
In this post, we will show you, step by step, how to utilize HubDB as an events listing page. (This assumes that you have a basic knowledge of HubDB or web development.)

Here is a link to the code so that you can you copy and paste it onto your site.
Step 1. Create a HubDB table for your events
Navigate to HubDB tables by logging into your HubSpot portal. From the main menu click the dropdown for Content, then select Website Pages. On the left sidebar you will see More Tools where the link to HubDB can be found.
Start by creating a new table. Delete the default name field and create the following columns:
- Event Date - date field type
- Event Name - text field type
- Event Description - rich text, or text field
- RSVP Link - text field
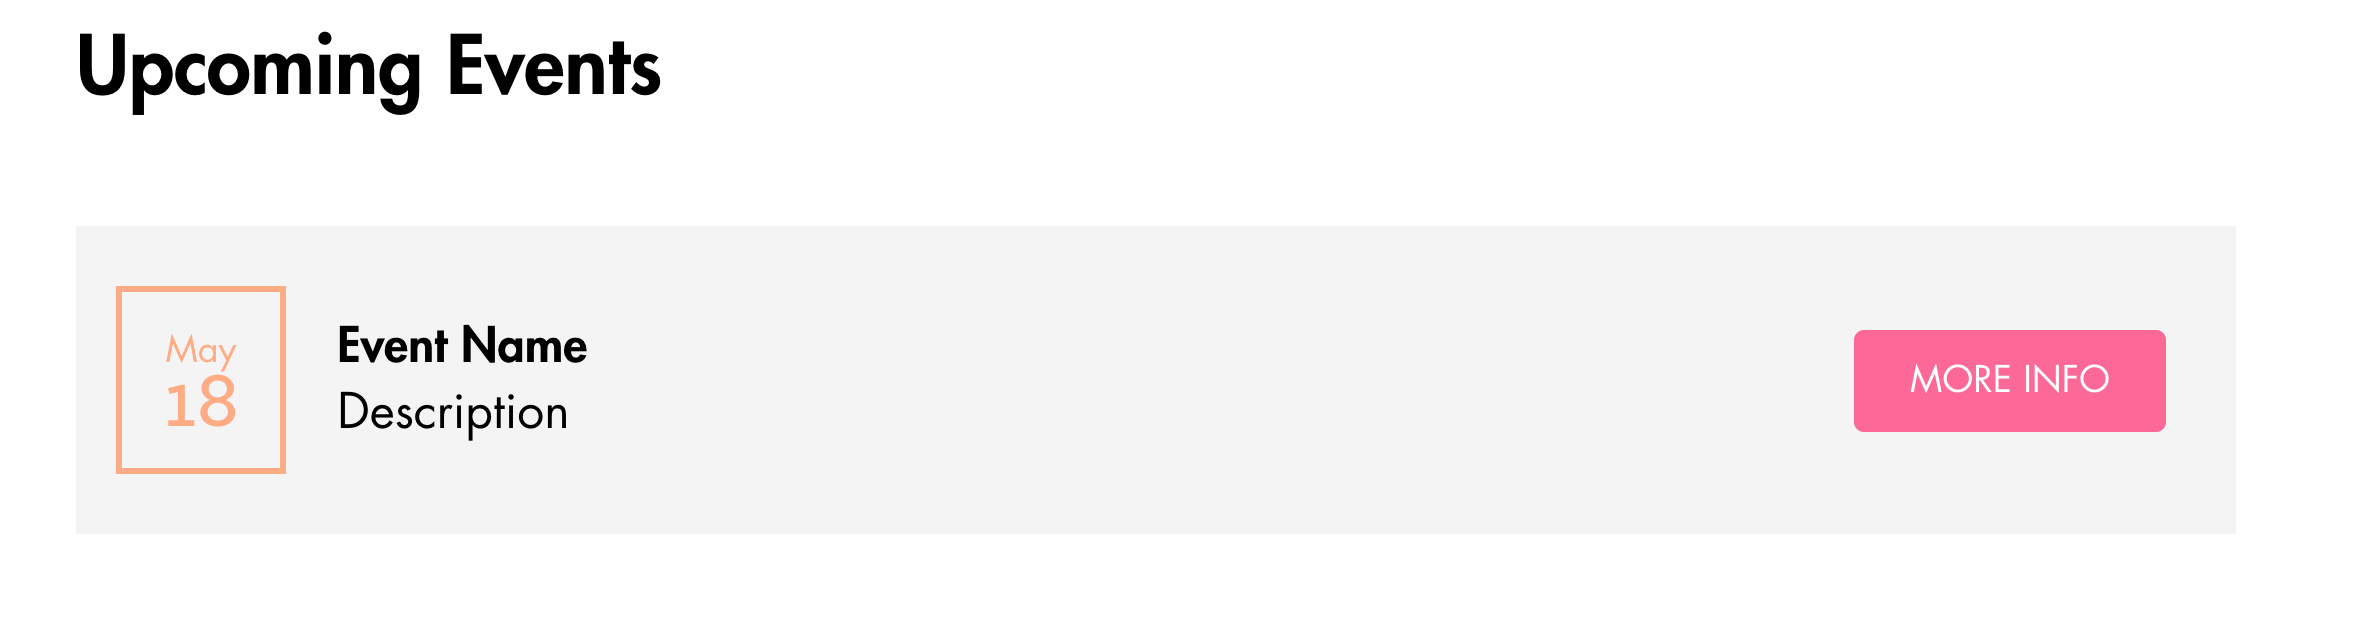
When finished, your table should look like the following:
Step 2. Create a template and add a HubL module
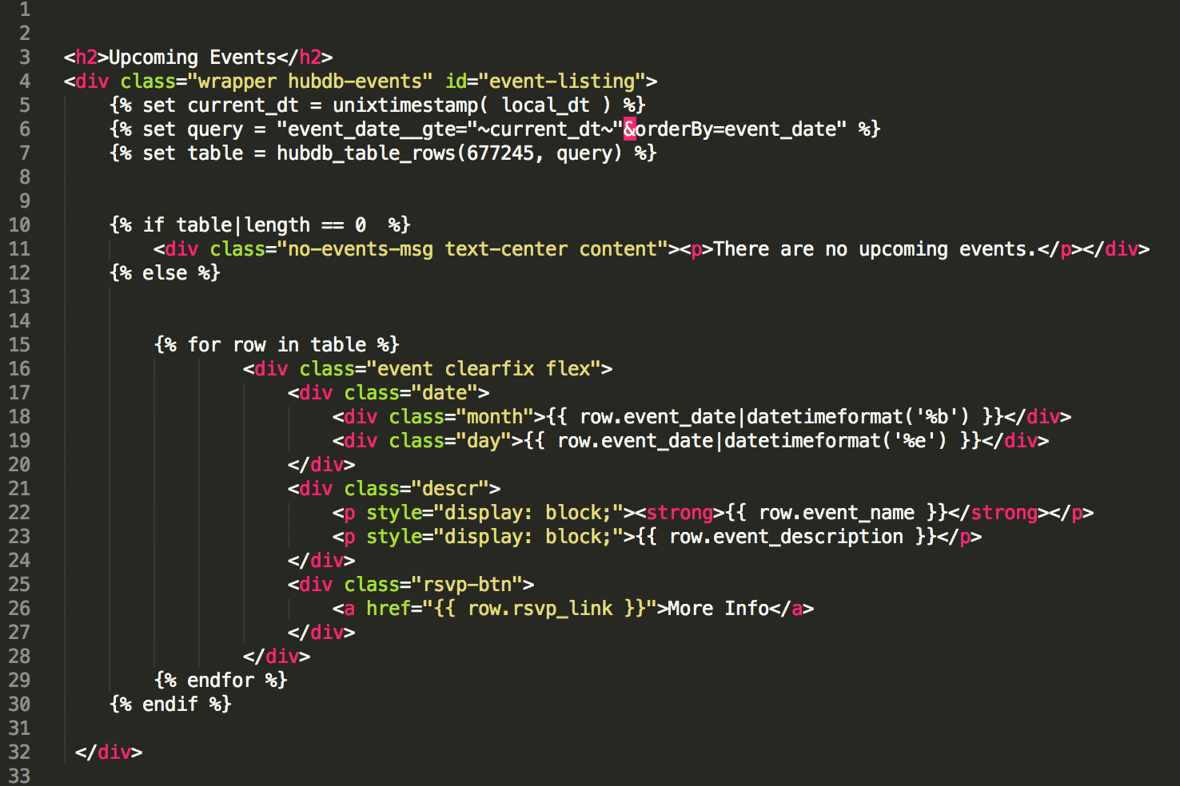
Within the custom HubL module, paste the code provided through the link at the beginning of this article: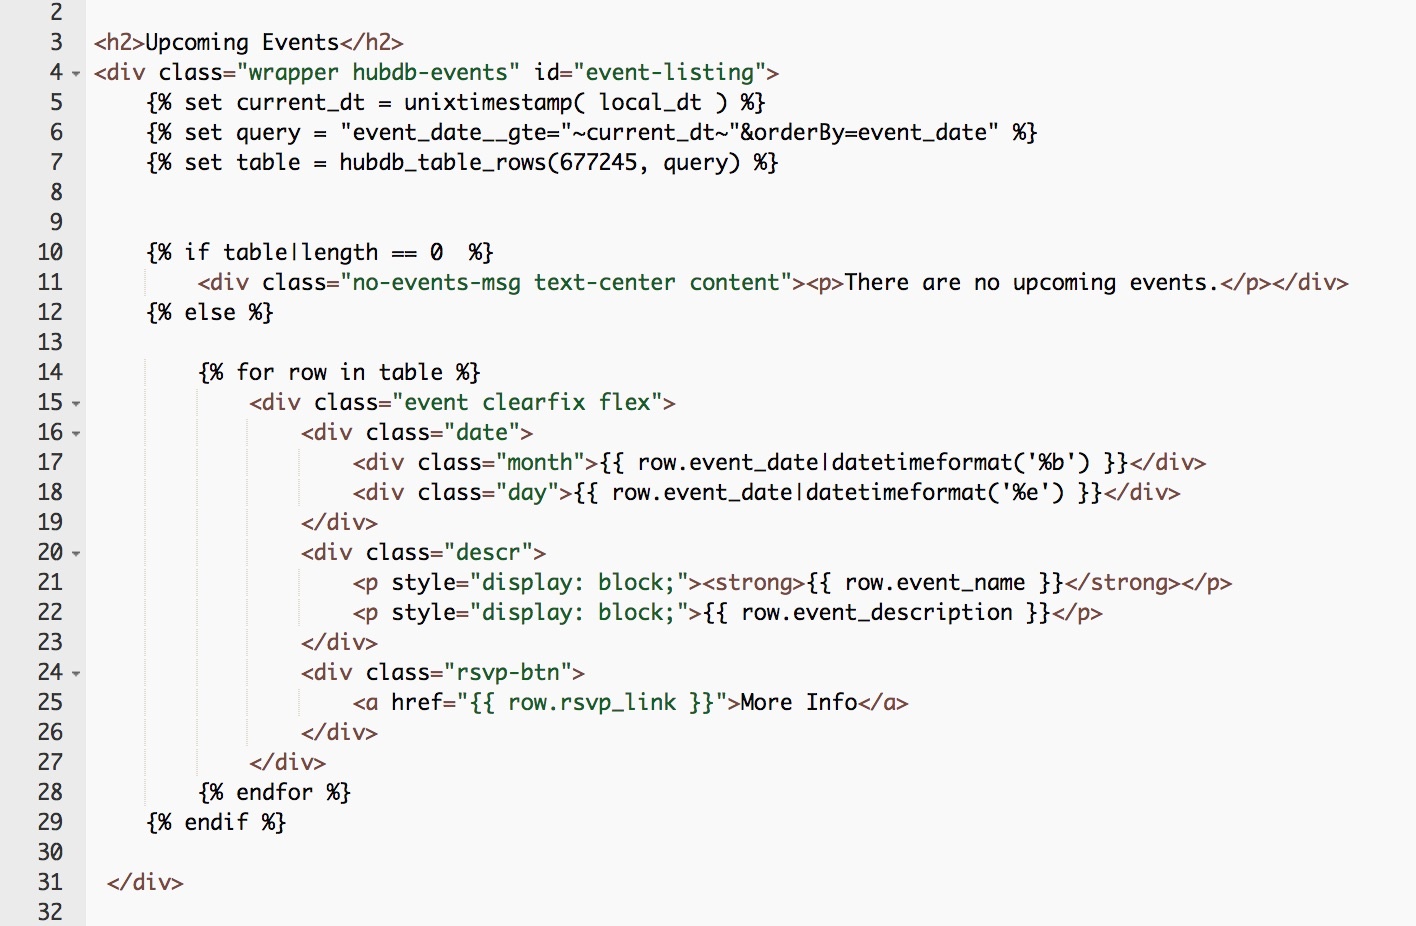
The first item you’ll see on line 5 is that we are setting a variable so that date and time will be the local date and time of the user viewing the website.
The second item you’ll see on line 6 is the query from the database table, where we indicate that we only want to return results in which the event date is greater than the current date, meaning we don’t want to show events whose dates have already passed.
The third item on line 7 where we place the table is telling HubSpot which table to grab. You’ll notice when you are editing your table that there are six numbers at the end of the URL. These act a unique identifier for each table. Copy those numbers and paste them over the numbers used in the example so you can place your table.
From here the rest should be fairly obvious. You can see an error message if no results are returned, and we have added some date-formatting filters with HuBL to make the dates user friendly.
Step 3. Styling and maintainence
Add CSS to your template to make it match your brand!
While past events no longer show up for the event listings, they are still in the HubDB table. It is a best practice to remove old ones so that there are not extraneous old events in the table.


Learn about web optimization with:
The Keys to Website UX and Usability


Other Insights You Might Like
-2.png?width=800&length=800&name=Blog%20header%20image%20(1)-2.png)